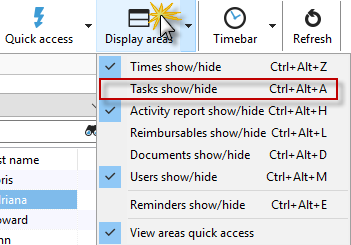
In the image menu or in the "View" menu item (see illustration) in the project manager, you can show or hide your personal task list.
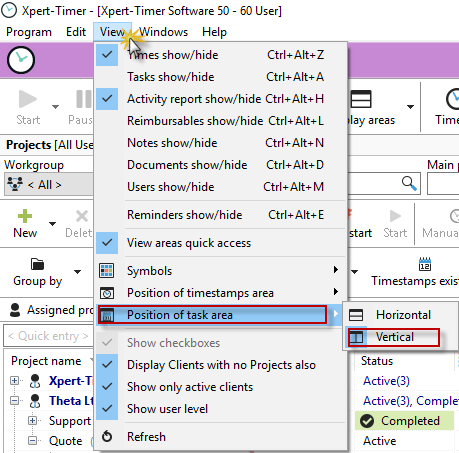
You can decide whether to display the task list horizontally or vertically in your Project Manager. You will find the option for this in the "View" -> "Arrange Task Area" menu item.
Your task list in Xpert-Timer is based on the "Getting Things Done" (GTD) method. You can categorize, group, and filter tasks. In addition, you can also book times for tasks. At the beginning of the working day, create a task list and assign estimated times for each activity. At the end of the day, you can then check exactly which activities turned out to be time-consuming and which ones you estimated correctly. This allows you to optimize your workflows, save time, and generate more profit.
There are two types of task lists to choose from. If you always have the project manager open, we recommend using the integrated task list. If you tend to work only with the timeline, you should use the personal task list.
Integrated task list:

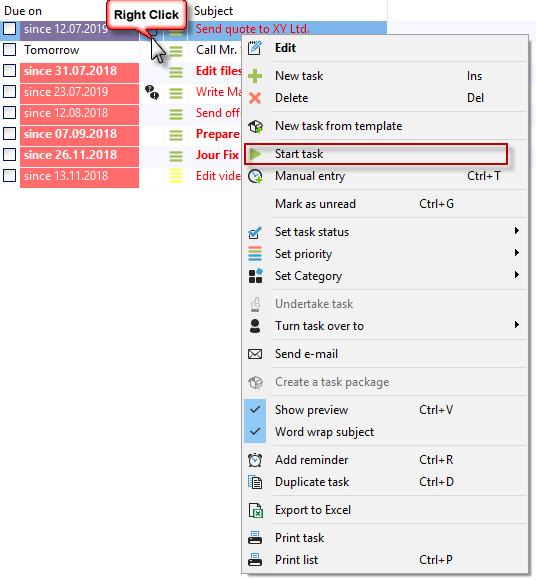
In this integrated task list, you can move tasks around as you wish using drag & drop. Simply select a task and drag it to another category. You can also drag tasks to another user in the project manager, which will assign the task to that user.
From here, you can right-click to start time tracking for a task directly. When you start the task, a timestamp with a reference to the corresponding project and task is generated in the timestamp list.

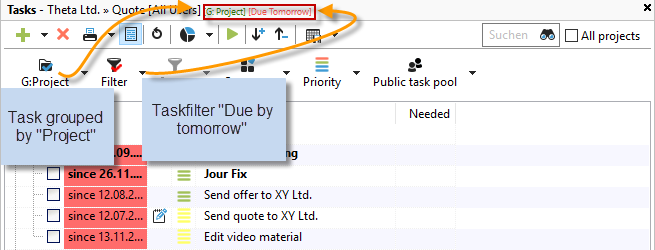
This also allows you to evaluate your booked times for tasks. To do this, set your grouping in the task list to "Project." You will now receive a list of your hours worked per task. In your integrated task list, you can also display the "Required" column. This gives you an immediate overview of the times incurred for your tasks.
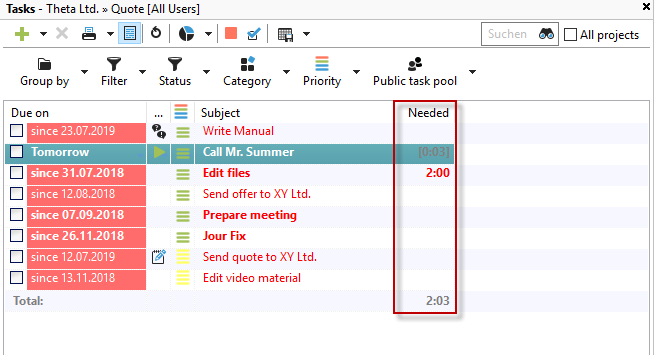
If you have activated a filter in your task list, a red or blue check mark appears on the filter button. The filters you have set are also displayed again via the filter options. In our example: All projects are displayed, G:Project -> Grouping by project, Due tomorrow -> The display filter is set to "Due tomorrow."
Personal task list
You can view your personal task list by selecting Window --> "Tasks on/off" in the menu. It will initially appear empty on your screen.


There are several ways to create a new task.
1.) If you have an ongoing project for which you have just thought of a task, you can simply enter a task with "normal priority" using the quick entry function.
2.) Click on the green plus sign to create a task. This allows you to specify many more settings for the task, such as priority, category, assignee, etc.
3.) You can create a new task by right-clicking on the list and selecting "New entry."
The newly created tasks will then appear in your personal task list. If you hover your mouse over the entries, you will see the additional information you specified when creating them.
For more details on the task list, see the chapter "Everything about tasks."