Select "Window" -> Document Management from the menu to access an overview of your documents.

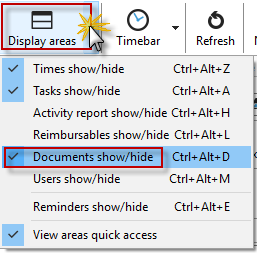
You can also display the documents for your projects in the Project Manager. To do this, use the "Display areas" button and select "Documents on/off."
Document management allows you to manage files and documents in Xpert-Timer. Documents can be stored either directly in the database or as a reference to a file on the hard drive or network. We recommend always creating documents as links, especially with Access or SQLite databases, as otherwise the database will become unnecessarily bloated.
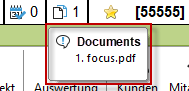
In the timeline, you can see whether documents are attached to your project.

If you move the mouse over the display, you will see a list of the documents.
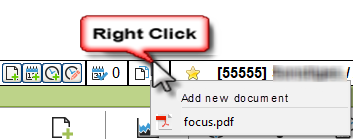
If you right-click on the timeline, you can open the document management system and assign additional documents to your project. You can also simply drag and drop documents onto the timeline or drop them directly into the project manager on the project.
The following dialog box is then available for selecting documents:

Now select your customer and the corresponding project to which you want to attach your document.
File types
Under "File type," there are five options for saving documents:
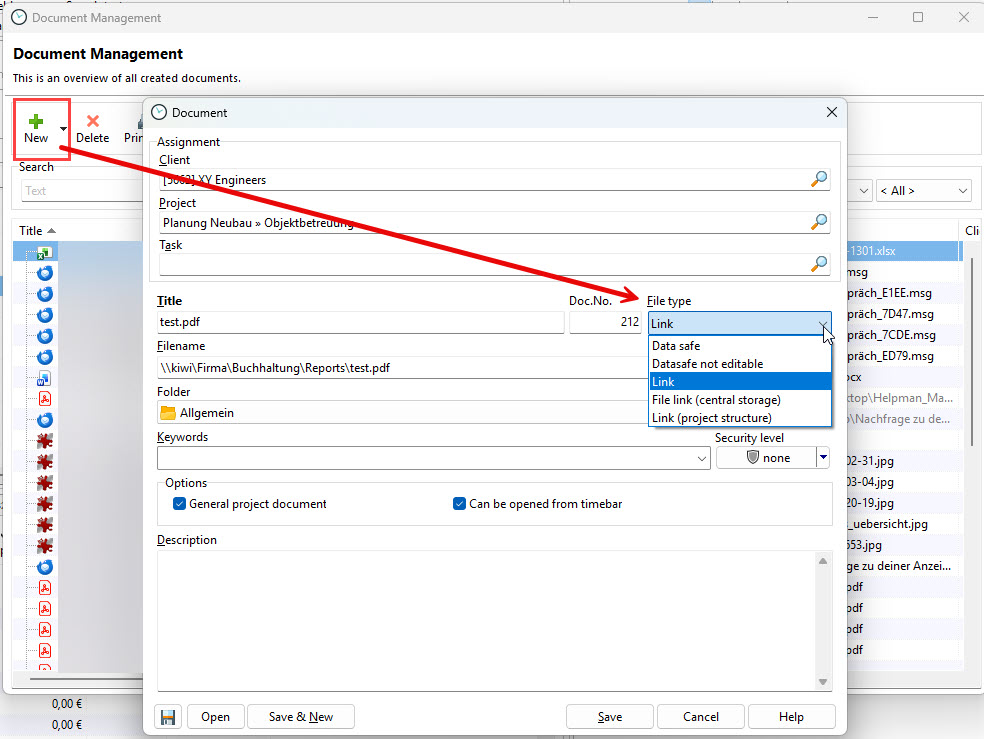
1. Save as link (central storage): You set a link to a specific document. Make sure that you do not create links to files on the local hard drive when working in a team. Otherwise, your colleagues will not have access to the document. You can specify the path to the central storage in Configuration -> System -> Documents.
2. Save as link (project structure): Here, the folder structure is automatically created based on your project structure. As with the central storage, you can specify the start path of the folder structure in Configuration -> System -> Documents. In this case, Xpert-Timer uses the folder structure customer name -> project name -> subproject name -> task.
3. Save as link: Here you can freely choose the target path of the document.
4. Save in data safe: This saves the document in the database. Since the documents are written directly to the database, make sure that you do not save unnecessarily large files (e.g., images) in the safe. This unnecessarily inflates the database and slows it down. Avoid using the data safe when using an ACCESS database, as the likelihood of data loss increases with the size of the database.
3. Save in the data safe (not editable): You save the document locked in the database.
Under "Security settings," you can control the visibility and access to the document. You also assign this security level to the respective employee in the employee data.
Options
If you select the "General project file" option, the document will also be visible in all subprojects. If you also want the project to be accessible from the timeline, check the "Accessible from timeline" box.
|
Note |
|---|---|
Editable documents such as .doc or .xls can be re-edited at any time and moved back into the database. However, documents in PDF format or similar are stored in the data safe (not editable). |
|